Tuesday, January 25, 2011

Green Beans Almondine Recipe

Hey there! You know, I honestly didn’t expect anyone to stop by my blog or ever see it, but apparently I was wrong about that! Blogger has this stats page (and oh HOLY CRAP am I ever addicted to it. Rocket Scientist has been putting up with my constant page view updates. He’s sweet like that) and it looks like people have been stopping by.

So…thank you! I really appreciate it.

I also appreciate the fact that blogger doesn’t show you how many times I’ve looked at the stats page.

Better for both of us that way.

But mostly me.

Anyway.

I have this weird habit sometimes of ordering, cooking, or otherwise acquiring vegetables and eating them.

In fact, one of Rocket Scientist’s favorite fake(?) insults for me is “Vegetable Eater”.

Yep, I’m a vegetable eater.

Known for it, even.

I just feel that if we’re going to do this thing where I blog about food and you read it (and I obsessively click refresh on the stats page, naturally)…I should make you aware of what is an indelible black mark on my status as a vegetable eater.

I don’t like fresh green beans.

Hate ‘em. They have a weird texture and they don’t taste right and they SQUEAK WHEN I EAT THEM. And unless I’ve gotten a hankering for live mice, I don’t expect my food to squeak when it’s chomping time.

And do you know what one of my favorite veggie dishes is? One that I request for each and every food-related Holiday family get-together (which, come on, is all of them)?

Green beans almondine.

And in my family we reconcile these opposing truths with the clever use of French style, cut, canned green beans.
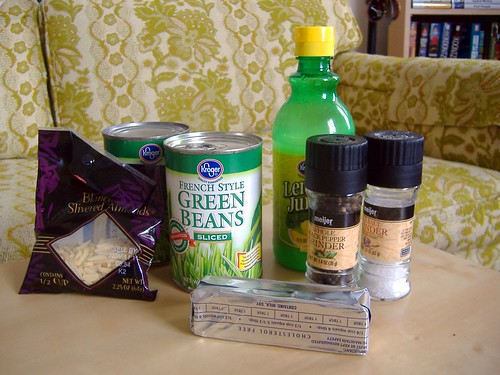


The Players

Now green beans almondine is a fancy way of saying green beans, almonds, and butter.
But with that fun ee sound repeated throughout. Is that assonance? Or with the n at the end of all three is in internal rhyme? I think its internal rhyme.

Anyway. We’re going to be using two cans of French style cut green beans, margarine (or butter), blanched slivered almonds, lemon juice, salt, and pepper.


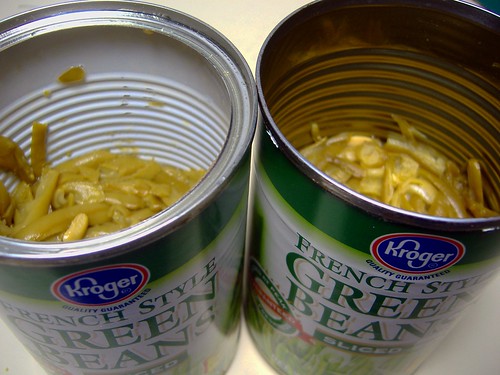
First, we’re going to need to drain these cans. I mostly took this picture because I thought it was funny that I bought these cans at the same time, but they have different lids on them.

It’s the little things, right?


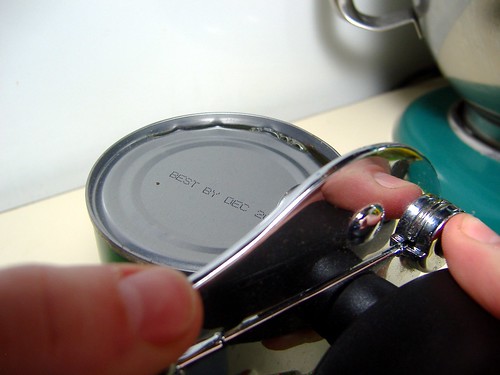
So grab the can that doesn’t have the tear lid (unless both of yours do…in which case just sit there feeling smug while I fiddle with mine) and your can opener, and get the top of that can off.

Also, take a moment to wish that you’d wiped down the counter for that picture.

Now grab your tear-top can (unless both of yours were traditional, in which case just sit there feeling smug that yours are already open while I fiddle with mine) and yank that thing off.


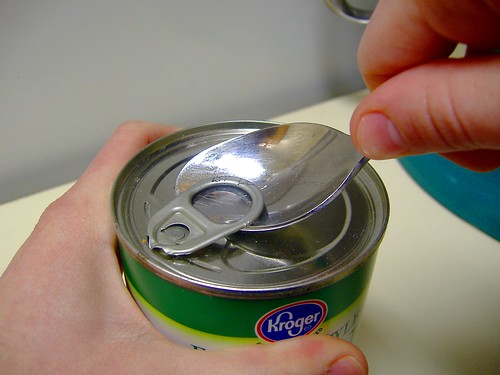
I almost always have to use a spoon to pry up the tear-y thing. So I’m not really sure why its supposed to be better than a can opener.


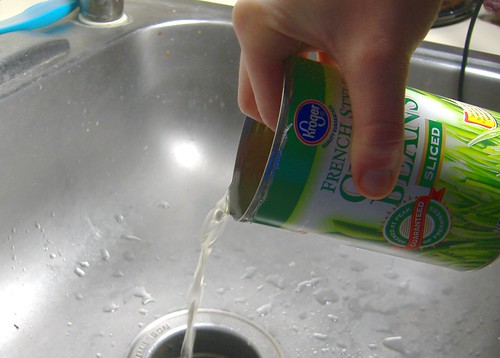
So just take the tops of the cans, drop them back in, and then use the can tops to hold the beans in the can while we drain off the bean juice.

When I would help my mom with this part, I always squished the crap out of the beans, trying to get all of the liquid out. I was paranoid that I would Do It Wrong and ruin the green beans. It’s amazing we didn’t end up with mush.

(Psst. I still squish the crap out of the beans when I drain them. But you don’t have to. I’m pretty sure.)


Now feel silly because you managed to cut your finger on the can, even though your mother *always* told you to be careful, the edges were sharp when you did this at home with her.

Just, you know, if you want to do it how I did it.

Once you have those drained off, just set them aside while we get the almonds ready.

I just wanted to make sure that the green beans were prepared and waiting in the wings like a high school freshman in the chorus of the Spring musical hoping that Miss Hannigan would fall suddenly ill and SHE would have to go on instead.

You know, like that.


While the beans were entertaining delusions of grandeur, I tossed a couple of tablespoons of margarine in a skillet, over medium heat. Make it three.

I’m using margarine because it’s cheap. I should probably use butter and cut a few chemicals out of my life, but, well, college. And margarine was ¼ of the price of butter.

But by all means, use what you have on hand. My need to justify my use of margarine should in no way affect your beans.

Anyway.

I like to separate out the margarine into individual tablespoons, just because it melts faster.


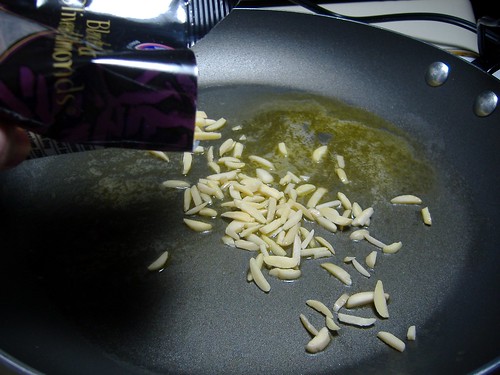
Now, we’re going to toss in our almonds.

For two cans of beans I like to use half of a ½ cup package, so about ¼ cup of blanched slivered almonds.

If it doesn’t look like enough butter to cook your almonds in, throw in some more.

We’re going to fry (sauté?) these until they start turning brown.

Now, I have a tendency to let mine get darker than most. I really love the smoky flavor that gives the almonds.

Other people call that flavor burnt. So do what you like.


These look done.

Now we’re going to grab those beans and toss them in with our almonds.

The beans are already cooked through, so we’re mostly just mixing them in with the almonds and heating everything up.


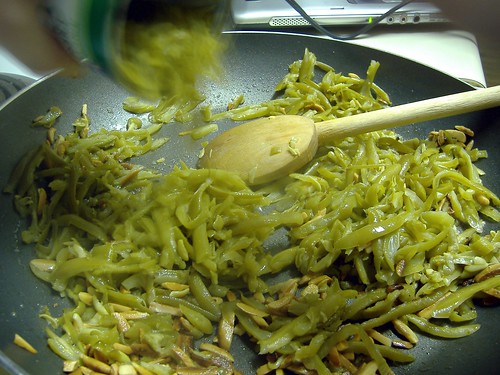
Just stir all that together, and stir occasionally to make sure nothing is burning.


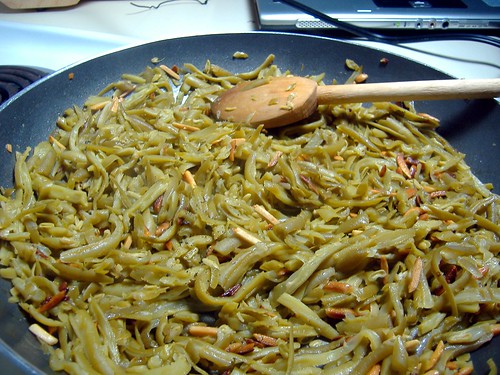
I like to put some fresh cracked pepper on top, and some sea salt from those nifty little grinder things.

Makes me feel like I know what I’m doing.

Also? Way fancier than my other pepper.

Which looks like this:


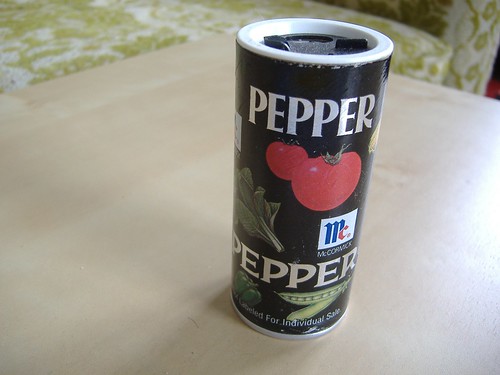
And tastes like nothing.

I also like to put lemon juice on mine. You can leave this step until you serve, you can do it now and mix it all in, or you can be like me.

I do both.


Just shake some over the top. Not a lot, but enough to give it a little bit of bite.

You can always add more when it is on your plate. 

Also, if you could make your lemon juice really blurry? I'd appreciate it. 


And that’s it! Just serve it as a side dish with your next meal, or you can be like me.

Sometimes a bowl of these is dinner.

I find other food just gets in the way.

These reheat really well, and are a super easy way to dress up canned green beans.

Recipe:
-          2 cans French style cut green beans, drained
-          3 tablespoons butter
-          ¼ cup (half package) blanched slivered almonds
-          Lemon juice, to taste
-          Salt and pepper, to taste
Directions:
        Drain the green beans, set aside.
        Melt the butter in a skillet over medium heat, and sauté the almonds until golden brown.
        Add the beans, stir to incorporate.
        Add salt, pepper, and lemon juice to taste.
        Stir occasionally until heated through.
        Enjoy!

Monday, January 17, 2011

Slow Cooker Applesauce

Hello everyone! It’s a gorgeous day outside, I’ve got a tall glass of diet Citrus Drop (store-brand Mtn Dew…what? I’m a college student. As you’ll soon learn, in my kitchen I loves me some store brands.), and my first ever recipe post!

Today I’m going to show you how to make applesauce in your slow cooker. The recipe I’ve got here is synthesized from a number of places, so I feel comfortable listing the ingredients I used at the end (along with what I’ll do differently next time…because when have I ever left well enough alone?). However, looking back, I do seem to follow most closely to the applesauce recipe over at the Slow Cooker blog, so here! Check out Stephanie’s method, and notice that she has a bit more success than I do here.

The Players

First, the players. We’ve got lemon juice, brown sugar (light, but I think dark would be fantastic), cinnamon, vanilla, and apples.


I used McIntosh apples. They’re tangy, sweet, and I had a 3 lb bag of them in the cupboard that were getting to the “We’re going to be mealy and gross!” stage.

 So, McIntosh. If I’d had a different variety of apple threatening grossness, I would’ve used those.

Basically everything here is a store brand item, and I’ll tell you why: The cheap, I has it.

I’m a college student, working part time, and I haven’t noticed enough difference in most things to justify paying more for a name brand. Now, if I hate the store brand, I’ll buy name. Mostly, though, embrace the generics. It’s easier on the wallet.

So, I used 6 apples from a 3 lb bag (so you know they’re smaller than the ones you buy individually).

I got out my handy cutting board. I got this one at Ikea (lovelovelove Ikea). It’s bendy and blue, and it came in a pack of two so I have one labeled “MEAT” the other labeled “NON-MEAT” so that I can be less paranoid about things being cross-contaminated.

I don’t want raw chicken ick on my bell pepper slices. I’ve had food poisoning and I do not recommend it.


Anyway, so we’re going to use a cutting board, and I have this nifty apple corer/slicer dealie. I got it for a couple of bucks at Wally world, I think. They’re all over the place. Of course, nothing is preventing you from coring and slicing on your own. More power to you.


I sliced/cored an apple, then I took a sharp paring knife and cut off the peel. (As I write this, I’m no longer convinced that’s the right word…peel? Rind? What’s on the outside of an apple? Oh God, words.) Just slowly slide the knife under the peel and around the curve of the apple.

Or you could use a vegetable peeler on it before cutting it up. Whatever makes you happy.

The crock pot I’m going to be using today was a gift from Rocket Scientist’s parents for Christmas, and I love it hardcore. It’s a 2.5 quart Crock Pot, and this is my first time using it!

I’ve been going a little nuts finding slow cooker recipes on the interweb, so it’s likely that I’m going to be posting a lot of slow cooker recipes. Just a heads up.


So just pile your apple slices in the slow cooker. Doesn’t that just look hopeful? I don’t know. There’s all this potential. Like, “Emily, we’re just sliced ingredients! You haven’t screwed up yet!”

Not that I routinely receive messages from produce, or anything. Ahem.

Next we’re going to start piling in the other goodies.

First, the lemon juice. I used two tablespoons, but I think next time I’ll only use one.


Just dump that on in, no worries about drizzling, but by all means, drizzle if it gives you a sense of control over the process.

I drizzled. Sometimes I just need to feel important.


Now, we’re going to throw in some water. The recipes I based this off of differed on this point…but the recipe I linked to up top used ¼ cup of water.

So I used a scant ¼ cup, because I have to fiddle.


Now the vanilla.

Full disclosure: I love vanilla. No, really. I *love* vanilla. There are very few flavors that I enjoy as intensely as I enjoy vanilla. So why the imitation extract? Cheapness and hesitation.

I’ve got Madagascar Vanilla Bean Paste (buy it, please. It’ll change your life.), but I didn’t want to throw it in my applesauce until I knew my applesauce was worthy of fantastic vanilla.

So, imitation. I use it in a lot of things, and it hasn’t dampened my love of vanilla. It’s my not so secret shame.


Now, I used a heaping tablespoon of brown sugar.

I love the way brown sugar scoops. It’s just perfect. And it gets that little ridge around the bottom, like the feet on a macaron.

Ooh. Macarons.

Ahem. I may need to try making macarons. Mind if I drag you along for that inevitable failure? Excellent. Didn’t think you’d mind ;)


Next up is the cinnamon. A half teaspoon looked good for the amount of apples I had.

Just sprinkle it on. I love the color of cinnamon.


Now stir it all together. The smell and feel of this step reminded me of making apple pie. Oh! I should make apple pie and give you all the recipe. It’s a good one, if I do say so myself.

And I guess I don’t, because Rocket Scientist loved it too.

Rocket Scientist is a noted supporter of most of my cooking/baking efforts. So long as there are minimal vegetables.

And no peanut butter.

And no pasta.

He’s odd, but I love him anyway.

Now! Once the apples have been all coated with everything we tossed into the slow cooker, put the lid on, turn the knob on the front to Low, and just back away for about four or five hours. Or until the apples are tender.

I didn’t get a picture of it, because steam was fogging up the glass top on my slow cooker, but my apples had started to split themselves along the back of the slice.

Please resist the temptation to peek before 4 hours are up. You take off the lid and all of the steam gets out and then it takes even longer to cook. And it might dry out your applesauce.

Possibly.

It could happen, right?

Anyway, now that four hours have passed, take off the lid, breathe in that amazing cinnamon apple smell…and mash the hell out of the apples with a fork.

Please pretend that I took a picture of the apples pre-mashing, instead of jumping right in with the fork as I was late to go see True Grit with Rocket Scientist and a friend of ours.


Lovely! These apples were super tender and just fell apart as I mostly stirred.

Now, I have a confession.

My applesauce was too watery.

It isn’t inedible, and I could certainly drain some of it off (and likely will), but when I make applesauce again, I’m going to either cut the amount of water I put in in half…or just omit it entirely. I think I may omit entirely. I just feel that the apples produce enough liquid on their own…(if you don’t take off the lid!)

Also, I used 2 T of lemon juice, because I didn’t have a fresh lemon on hand. I may cut that down. Although, after sitting in the fridge for a bit, I think the balance of flavors in the applesauce is really nice. So maybe the lemon juice is just fine.

But there you have it!

Applesauce with minimal effort in your slow cooker. Delicious.

My suggested recipe:
- 6 medium McIntosh apples, sliced and peeled
- 1.5 T Lemon juice
- 1/8 c water
- 1 tsp vanilla
- 1 T brown sugar (light or dark)
- 1/2 tsp cinnamon
Combine in 2.5 qt slow cooker. Cover, cook on low for 4-5 hrs or until tender. Mash with a fork, serve warm or chill.

Friday, January 14, 2011

Commenting/Operating Policy

I don't expect anyone to read this, but I thought on the off chance anyone did, I should probably lay out my ground rules, since I do have a couple.

Commenting Policy:
1) No comments to the effect of "But if I eat that I'll gain 30 lbs!" or "You're being so good, eating so low cal!" if I happen to post a veg-heavy recipe. I struggle with disordered eating, comments of this kind (although well-intended) only exacerbate the crazy. I appreciate your cooperation.

2) I will absolutely respond to questions in comments! I'd love to hear from you. So don't hesitate. Even if it's "Whose shoes are in the background of the applesauce picture?" The answer to that is Rocket Scientist. Just so you know.

Operating Policy:
1) If the recipe is one of mine (meaning a friend gave it to me, I found it at a non-blogging site, it's a family recipe, or one I'm making up) then I will post the recipe in the post. It'll be explained throughout the post, and then in short-form at the end.

2) If the recipe is NOT mine (meaning I found it at another blog) I will link to the original recipe. I feel like this is the only fair way to do it. I don't want to steal traffic, and I figure this way anyone who wanders by might find another blog they'll love! Win-win, right?

I imagine I'll add to this over time, but thanks for your patience!

Thursday, January 13, 2011

Hello World!

Hello! Emily here, finally getting off my duff (although currently sitting on it...) and starting that blog I kept meaning to start.

I love food blogs. Love them.

It might be an obsession.

Anyway, in this blog I intend to chronicle my cooking, baking, and possibly knitting adventures. I'm a (nearly!) 23 year old college student/code monkey, with a penchant for getting in way over my head, and an irritating desire to know everything. I've no illusions that anyone will actually read this, so it keeps the pressure low ;)

So why Oddly Domestic? Well, because I am. I've always been a bit of a smartass, a feminist, a lover of literature, oddly dressed, into music, movies, video games, coding, computers, etc. And I loved to sew. And bake. And cook. And knit. My mother used to tell me that for being so...me...I was oddly domestic. So, when it came time to name this new toy of mine, I thought it was fitting. 

I hope to start actual posts soon, and look forward to this whole blogging thing.